Create or Delete User-Defined Flags
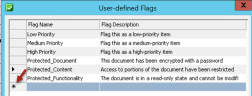
You can create user-defined flags, which are used to ‘flag’ documents when performing QC tasks. After you create your user-defined flags, they appear in the QC Flags Window along with the default system flags. You can also delete user-defined flags.
Create New User-Defined Flags
To create new user-defined flags:
-
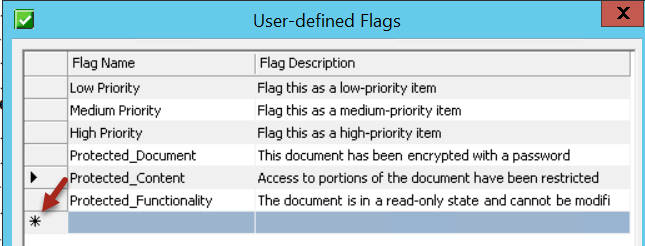
On the QC menu bar, click Tools > User-defined Flags.
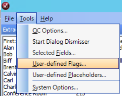
The User-defined Flags dialog box displays.
-
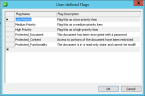
Click the line with the asterisk (*). The line highlights.
-
Click in the Flag Name field of the highlighted line and enter a flag name. A maximum of 50 characters is permitted.
-
Tab over to the Flag Description field and enter a description for the new flag.
-
Repeat these steps for each additional user-defined flag.
-
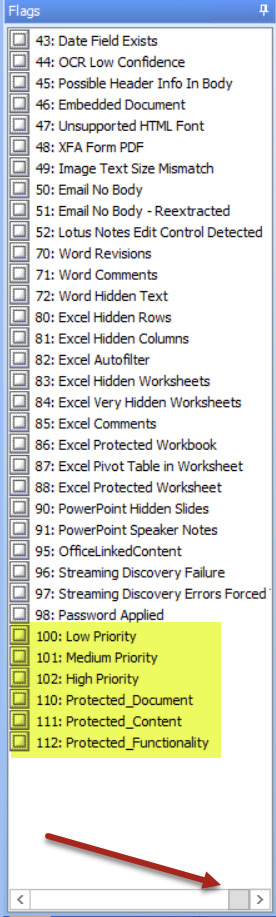
Click OK. The flags appear in the Flags window.


Note: If you have your flags window anchored on the right side of the QC interface, you may need to use the scroll bar to display the user-defined flags.

Delete User-Defined Flags
You can delete any user-defined flags, including the user-defined flags already supplied with the eCapture QC Module. However, if the flag was assigned to a document in a client it cannot be removed. If you attempt to delete a flag that is in use, the system displays a dialog box indicating that the flag cannot be deleted because it is in use by a client.
To delete flags:
-
On the QC menu bar, click Tools > User-Defined Flags.
The User-defined Flags dialog box displays.
-
Click the shaded area directly to the left of the flag name.
-
Right-click in this shaded area to display the right-click context menu.
-
Click Delete. The flag is removed from the dialog box.

Related Topics